It's been a while... I feel like I haven't blogged for an eternity!
I ended up giving myself a ban on blogging (and sleeping, eating, socialising... pretty much everything except report writing) while I finished my exams and final coursework, and then I ended up going on holiday for a bit afterwards. But my calendar is now free, which means I'm baaaack!
I feel pretty out of the loop just now, and my momentum for writing has dwindled slightly, so hopefully it won't be long before I'm caught back up with the blogging world!
Monday, 22 May 2017

Thursday, 6 April 2017
REVIEW | Liz Earle Natural Skincare
Skincare has been a big thing for me since the age of about 11. It seems really young to me now, but despite not really wearing make-up properly until I was 13 or so, I was unfortunate enough to have had problem skin from around then; at one point, I was having to attend dermatologist appointments every six weeks and take medication, which was seriously not fun as a teenager :(
Luckily, I've been blessed with a mother who is a proud owner of just about every skincare product under the sun, and after years of experimenting (and quite a bit of time watching tutorials on QVC), she's helped me to find the best range for my skin. I'm very grateful for the fact that everything eventually cleared up around 16/17, and so far I've managed to avoid any repeat cases, but that hasn't been without work.
One range that I've used on and off for years is Liz Earle; in particular, the Cleanse & Polish cleanser, Instant Boost skin tonic, and the Skin Repair moisturiser (their Orange Blossom Botanical body wash is also amazing for sensitive skin, but that's going off topic for now!).

I have to admit, it was the first range of products I used when my problems started, and it actually wasn't right for me at the time - it just didn't agree with my skin, but now that I look back, I'm not sure if that was actually the case or if it was just that it required more attention than a skincare routine. After years of switching between different brands, I came back to Liz Earle around a month ago, and I've fallen in love (and I've also totally realised why my mum was so gutted that I couldn't use it years ago). I know it's hardly a new release and there'll be so many reviews online by now, but I figured I'd go through the products I've been using!
This is the first step in the process - probably my favourite too (it smells reaaally nice and it's so good to see your make-up practically melt away!). It's also won a number of awards, and rightly so. It suits all skin types, and there are so many natural ingredients in there.
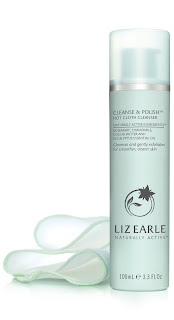
The first part is the "cleanse" stage, where you simply apply the cream straight to your face (no need to include anything else, just straight on whether you've got make-up on or not), and massage it in to remove any trace of make-up. The best part about this, for me at least, is the fact that it's totally safe to use on eye make-up, so no need to faff about with any other products! I tend to wear a heavy amount of make-up daily, yet I only ever need to use two pumps' worth at the most. A little goes a long way!
Once you've spread it all over - and in my case, caused your face to go a dark grey colour with the mix of mascara/eyeliner/foundation - you then move onto the next stage; you guessed it, "polish". This is where you take the muslin cloth (there's normally two provided when you purchase the set), run in under warm/hot water, and then use it to remove the cleanser. Even when I wasn't using Liz Earle's products, I still always used the muslin cloth to remove whatever I was using! They're super useful and are designed to exfoliate and remove dead skin, so your face ends up feeling sooo soft and hydrated.
For myself personally, I find that the product always makes my skin look a lot brighter after use. It's also great when I do have the occasional breakout; it somehow manages to tone down any redness, and just generally makes my skin feel a whole lot more smoother. It kind of makes me wish I'd just persevered with it way back when it was at its worst!


Luckily, I've been blessed with a mother who is a proud owner of just about every skincare product under the sun, and after years of experimenting (and quite a bit of time watching tutorials on QVC), she's helped me to find the best range for my skin. I'm very grateful for the fact that everything eventually cleared up around 16/17, and so far I've managed to avoid any repeat cases, but that hasn't been without work.
One range that I've used on and off for years is Liz Earle; in particular, the Cleanse & Polish cleanser, Instant Boost skin tonic, and the Skin Repair moisturiser (their Orange Blossom Botanical body wash is also amazing for sensitive skin, but that's going off topic for now!).

I have to admit, it was the first range of products I used when my problems started, and it actually wasn't right for me at the time - it just didn't agree with my skin, but now that I look back, I'm not sure if that was actually the case or if it was just that it required more attention than a skincare routine. After years of switching between different brands, I came back to Liz Earle around a month ago, and I've fallen in love (and I've also totally realised why my mum was so gutted that I couldn't use it years ago). I know it's hardly a new release and there'll be so many reviews online by now, but I figured I'd go through the products I've been using!
Cleanse & Polish Hot Cloth Cleanser
This is the first step in the process - probably my favourite too (it smells reaaally nice and it's so good to see your make-up practically melt away!). It's also won a number of awards, and rightly so. It suits all skin types, and there are so many natural ingredients in there.

Once you've spread it all over - and in my case, caused your face to go a dark grey colour with the mix of mascara/eyeliner/foundation - you then move onto the next stage; you guessed it, "polish". This is where you take the muslin cloth (there's normally two provided when you purchase the set), run in under warm/hot water, and then use it to remove the cleanser. Even when I wasn't using Liz Earle's products, I still always used the muslin cloth to remove whatever I was using! They're super useful and are designed to exfoliate and remove dead skin, so your face ends up feeling sooo soft and hydrated.
For myself personally, I find that the product always makes my skin look a lot brighter after use. It's also great when I do have the occasional breakout; it somehow manages to tone down any redness, and just generally makes my skin feel a whole lot more smoother. It kind of makes me wish I'd just persevered with it way back when it was at its worst!
Instant Boost Skin Tonic

Next is the Instant Boost tonic, which is fab toner with a gorgeous scent (to be fair, all the products have a nice smell, there's no need to point it out). It's great for ensuring that any remnants of make-up are removed before the final stage, and I find it leaves my skin feeling totally refreshed. It can be applied by simply pouring a dab onto a cotton wool pad and using it to just glide over your face. ** MUM TIP. I wouldn't have known this without mum telling me, but apparently it isn't suitable for using on your eyes. Maybe this is common knowledge for toners and I'm just out of the loop, but anyway ** I always make sure not to skip this one, just because I like being reassured that I've got as much of the day's make-up off as possible. Plus it just generally leaves my skin feeling really good!
Skin Repair Moisturiser - Normal/Combination

The final step is the moisturiser, which again, I totally love. To be honest, I was using a really great moisturiser before this and so I thought it would be hard to try and beat, but this one is just as good - if not better, considering it's a fraction of the price. Once again, a little goes a long way with this product, and the results are always really visible to me the next morning. I always find that I wake up looking fresh (somewhat, let's not get too carried away), and I especially notice how well this moisturiser works for me when applying foundation; I use the MAC Studio Fix powder, and previously I tended to find that I'd end up all patchy due to areas of dry skin. Not any more! I'm really pleased with this, and I'd even consider continuing to use it as my daily moisturiser even if I changed up the rest of the routine.
Apologies if this has gone on forever, I'm still new to the whole reviewing thing! This was definitely something I was determined to do one on though, so hopefully it'll serve to help out in some way :) Thanks to everyone who's given me feedback so far, it's been a huge help! ♡
Follow my blog with Bloglovin
Tuesday, 4 April 2017
My Experience with Home Bleaching Kits
I hate hate hate my natural hair colour.
It's something I've always despised, but to be fair, I suppose there's not really much wrong with it. It's pretty much brown, but being Scottish and all, there's the slightest hint of red and that's what I don't like - I'm constantly told by my parents and grandparents to just embrace it, but I'd rather not!
One colour I always wanted to try was blonde - whether that was golden or platinum, I didn't care; I just wanted something different from my own colour. I'd heard so many horror stories though, and that put me off for years, until I discovered ombre hair kits. After a couple months of using these, I figured last year, "hey, I'm managing this without any disasters, what's the worst that could happen?"... and this is where my hair nightmare journey began :)))
So I'll admit, I'm not someone who'll sit and properly plan this kind of thing through. When I get an idea in my head, I'm determined to race to go through with it. Of course, this is exactly what happened here.
I Googled a few tips on home bleaching, and went to Boots to pick out a range that my friend had recommended. I got home, followed all the instructions and my advice from Google, and went ahead with the application.

As you can see here, not exactly what I had intended (I also did all of this in my boyfriend's flat while he was out at college, and his face here is exactly what I was greeted with when he came in the door that afternoon. Also, obviously not a good photo of me anyway. For some reason I thought over-contouring my nose would draw some attention away from the situation, don't ask). Not only were the ends of my hair orange, but my roots had gone a weird yellow/orange/bright white fusion too. Really do your research, kids.

I ended up staying indoors like this for near enough a week, before I decided enough was enough and I was going to get someone to fix it professionally. At least, that was the plan until I was quoted prices, none of which I could stretch my student budget for...
I KNOW I was being really stupid in doing it myself a second time, but I was poor, desperate and I HAD ORANGE HAIR. I was going back home for summer the next week, where there's no drugstores selling hair dye nearby for a good few hours and no available hairdressers for months at a time, so I had to do something.
I waited about a week maybe, and then braved using the same product as before; I knew it worked for other people, so I was aware that it was just my inexperienced idiocy and not the dye's fault. I think this time I actually left it on for a tiny bit longer, which was probably really stupid, but...

Still not great, I know. But at least it was no longer the colour of a traffic cone, and I'd managed to fix my roots by painting over them with a light brown root touch-up kit. I was able to go outside once more, and my flatmates finally saw me again and laughed at me a lot.
Thing was, it still looked ridiculously blonde. Like, in-your-face blonde. Bearing in mind that my colouring isn't naturally suited to that shade, having a really bold colour made me look a bit stupid.
Yeah, there was a third step. Idiot.
Thankfully, I was well over my bleaching stage. All I had to do was get it to a point where it looked natural enough on me.
I decided to pick up some purple shampoo and conditioner just to get the remaining orange-y bits out (Touch of Silver, absolute life saver), and came across Bleach London's White Toner, so I picked it up to try (because my hair was still intact, it was fine, right?). I am still so grateful that this existed because god knows what option I'd have gone for otherwise.


It's something I've always despised, but to be fair, I suppose there's not really much wrong with it. It's pretty much brown, but being Scottish and all, there's the slightest hint of red and that's what I don't like - I'm constantly told by my parents and grandparents to just embrace it, but I'd rather not!
One colour I always wanted to try was blonde - whether that was golden or platinum, I didn't care; I just wanted something different from my own colour. I'd heard so many horror stories though, and that put me off for years, until I discovered ombre hair kits. After a couple months of using these, I figured last year, "hey, I'm managing this without any disasters, what's the worst that could happen?"... and this is where my hair nightmare journey began :)))
The initial bleach
So I'll admit, I'm not someone who'll sit and properly plan this kind of thing through. When I get an idea in my head, I'm determined to race to go through with it. Of course, this is exactly what happened here.
I Googled a few tips on home bleaching, and went to Boots to pick out a range that my friend had recommended. I got home, followed all the instructions and my advice from Google, and went ahead with the application.

Bam.
As you can see here, not exactly what I had intended (I also did all of this in my boyfriend's flat while he was out at college, and his face here is exactly what I was greeted with when he came in the door that afternoon. Also, obviously not a good photo of me anyway. For some reason I thought over-contouring my nose would draw some attention away from the situation, don't ask). Not only were the ends of my hair orange, but my roots had gone a weird yellow/orange/bright white fusion too. Really do your research, kids.

I ended up staying indoors like this for near enough a week, before I decided enough was enough and I was going to get someone to fix it professionally. At least, that was the plan until I was quoted prices, none of which I could stretch my student budget for...
The second attempt
I KNOW I was being really stupid in doing it myself a second time, but I was poor, desperate and I HAD ORANGE HAIR. I was going back home for summer the next week, where there's no drugstores selling hair dye nearby for a good few hours and no available hairdressers for months at a time, so I had to do something.
I waited about a week maybe, and then braved using the same product as before; I knew it worked for other people, so I was aware that it was just my inexperienced idiocy and not the dye's fault. I think this time I actually left it on for a tiny bit longer, which was probably really stupid, but...

Still not great, I know. But at least it was no longer the colour of a traffic cone, and I'd managed to fix my roots by painting over them with a light brown root touch-up kit. I was able to go outside once more, and my flatmates finally saw me again and laughed at me a lot.
Thing was, it still looked ridiculously blonde. Like, in-your-face blonde. Bearing in mind that my colouring isn't naturally suited to that shade, having a really bold colour made me look a bit stupid.
Yeah, there was a third step. Idiot.
The toner
Thankfully, I was well over my bleaching stage. All I had to do was get it to a point where it looked natural enough on me.
I decided to pick up some purple shampoo and conditioner just to get the remaining orange-y bits out (Touch of Silver, absolute life saver), and came across Bleach London's White Toner, so I picked it up to try (because my hair was still intact, it was fine, right?). I am still so grateful that this existed because god knows what option I'd have gone for otherwise.

It doesn't look much different here compared to the previous photo, but trust me, it was a miracle. It was a lot lighter in person, and I felt this was a good enough shade to return home with, so off I went.
The final touches
When I walked through the door, I thought my mum was going to burst into tears. I've never seen her look so distraught in my life. No attempt to hide feelings was made here, and I felt like crying myself.
Luckily, mum had an idea (which to be honest, I was a bit disappointed in myself for not thinking of) - putting a darker colour through as lowlights. Obviously. So obvious.

For some reason, I just decided to stop taking selfies of my progress as a blonde at this point - probably because I was sick of the sight of myself - so this is the closest photo of me to the time the lowlights were put in. Annoyingly you can't really see the colour up close, but it's definitely not as "out there" as the previous attempts (ALSO I am wearing shorts in the photo, I was on holiday haha). I managed to keep it like this for a good few months, but it's grown out now - I'm still too scared to touch it, even though I've started going to salons. It's kind of worked it's way into a dip-dye kind of look, but maybe one day I'll go back to full blonde - professionally, of course.
So, what did Hannah learn?
- ALWAYS research this kind of thing before going straight into it. Learn the actual techniques rather than launch into it assuming it'll all lighten no matter what
- Go to a professional when bleaching for the first time, or failing that, get someone who knows what they're doing to help you apply DIY kits
- Don't keep repeatedly bleaching thinking it'll all be fine just because there's no instant damage. The one thing I didn't mention is that my hair in fact didn't break throughout the bleaching process - but a small blonde chunk snapped off in my hand two weeks ago. I did all of this in May 2016 - it's now April 2017. 11 months later and it's still damaged! Don't do it.
- Actually know what shade you want to go for. Not every shade of blonde suits all skin tones, and I just assumed that anything would be fine for me. Not the case.
- Be prepared to spend a whole lot more on hair products to maintain the colour. Ironically I only went for the initial box dye because it was like £4.99 and I couldn't afford to go to a salon, but I've lost track of how much I've since spent in making sure it stays away from going brassy. V expensive.
- Just don't do it again. Don't even look at a home kit. Salon salon salon.
Saturday, 1 April 2017
Five Dresses for the Ultimate Baller
If you're a university/college student like myself, you'll be well aware that we're coming into ball season. Being someone who shies away from signing up to things, I've never really taken anything to do with events like these, but my uni's annual Sports Ball is happening next weekend and so I figured I'd at least go to one just to say I've been. **Side note - it's worth mentioning that I'm actually just gatecrashing this ball. I can't even remember the last time I took part in a sport of any kind, and I only ever break a sweat when I have to run downstairs to meet the Dominos delivery guy.**
Because of my lack of experience, and also the fact that my high school was too small to have a prom (boo), I had no idea what kind of outfit I'm expected to wear to this kind of thing. Turns out it's pretty formal, but with a three-course meal and a load of alcohol... so my next issue was trying to find a dress that could fit around these three factors! I'll probably do a bit about my outfit next week, but for now, I've shortlisted five of my favourite dresses I came across in my search :) (links are in the headings!)

I was really close to ordering this dress at first, until I realised that they'd sold out in my size :(
One of my worries was that I'd end up in something that looked way too formal, and a lot of the off-the-shoulder styles gave me that impression. Despite this, I felt like this dress's style manages to capture the whole "this is a fancy event, but I've still managed to play it cool" kind of vibe? I really love the colour too; I'm really into pastels, and so the fact that this shade is pretty light really drew me to it. I also liked that while the design isn't too OTT, there are little features within it that add a bit of a dramatic look. Much love!


Because of my lack of experience, and also the fact that my high school was too small to have a prom (boo), I had no idea what kind of outfit I'm expected to wear to this kind of thing. Turns out it's pretty formal, but with a three-course meal and a load of alcohol... so my next issue was trying to find a dress that could fit around these three factors! I'll probably do a bit about my outfit next week, but for now, I've shortlisted five of my favourite dresses I came across in my search :) (links are in the headings!)
1. Grey One Shoulder Maxi Dress, Missguided - £30

I was really close to ordering this dress at first, until I realised that they'd sold out in my size :(
One of my worries was that I'd end up in something that looked way too formal, and a lot of the off-the-shoulder styles gave me that impression. Despite this, I felt like this dress's style manages to capture the whole "this is a fancy event, but I've still managed to play it cool" kind of vibe? I really love the colour too; I'm really into pastels, and so the fact that this shade is pretty light really drew me to it. I also liked that while the design isn't too OTT, there are little features within it that add a bit of a dramatic look. Much love!
2. Pearl Embellished Panelled Seamed Mini Dress, ASOS, £45

I liked this one just because it isn't the typical traditional style you'd normally opt for with these events, but it still manages to maintain a kind of formal prom style. I'm a huge fan of high necklines right now (bit late to the party, I wasn't into them at all when it burst back into fashion a while ago!) and I think the faux pearl embellishment is so pretty :) Totally would've gone for this one had it not been for the fact that there's a ceilidh at the ball, and so I had to consider the length of my dress - this was a huuuuge deciding factor for me, I'm an islander after all!
3. Jessica Wright Sequin Lace Maxi Dress, Lipsy, £90
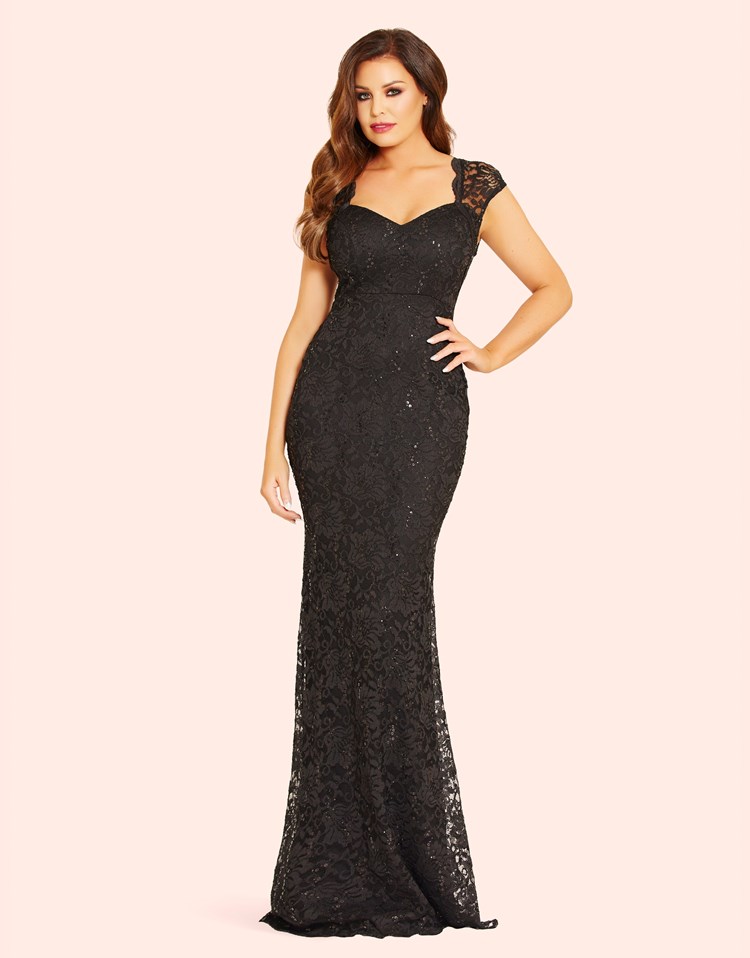
So this one might be a little bit more pricey than the rest (subject to opinion of course, I'm a poor student haha), but it was one that I kept going back to and considering. Sadly I ended up having to accept that this style of dress never really suits me, albeit reluctantly. Part of my choice was due to the fact that I have a big love for lace; it manages to look really elegant while still keeping things simple, even with sequins!
4. Pink Lace Sequin Bardot Scallop Dress, Quiz, £36.99

I tried this dress on when I was searching for my own, and I absolutely adored it! It appears quite pink in the photo, but I'd say it's a tiny bit lighter in person. Again, the lace was what attracted me to it, but the only thing I was worried about was whether or not it would be too tight - it seemed pretty fitted on the hanger. Turned out, when I tried it on, it actually really complimented my shape (somehow) while also allowing room to move around comfortably. I was this close to buying it, before I decided to go for a longer style - still considering going back for it anyway!
5. Red Sweetheart Neck Bardot Tie Maxi Dress, Missguided, £35

Red isn't something I usually wear out of a fear of looking too over-the-top (as I said, pastels are my thing haha), but whenever I do wear it I always find that it suits me, so I figured I'd keep it in mind when searching. I actually struggled quite a bit to find a red dress in the kind of style I wanted - and this one wasn't necessarily what I had in mind - but I still really liked it! I'm into the Bardot style anyway, but I thought the tie variation made it look really cute. I also tend to stay away from plunging styles; I found that this dress manages to pull it off without being too daring. Again, one I'm still considering - I've got a week to change my mind!
Tuesday, 28 March 2017
Some (Alternative) Top Tips for Studying
Hello all :)
So, the time for final exams is upon us yet again. Whether its uni, college, Highers or A-levels, it's always going to be a stressful period and I fully empathise with you! (I should actually be revising right now instead of writing blog posts, but hey ho)
When it comes to studying, I've developed certain habits that I've found work for me, but wouldn't necessarily work for everyone else. So whenever I see tips like "start preparing months in advance, study earlier in the day" and so on, I panic simply because I always find myself doing the opposite, and I worry that it's the wrong way to go about it. But doing the opposite seems to work for me, and it's taken me until university to actually realise that this is okay as long as I'm passing.
*Quick note before I go into this, obviously these aren't pro-health tips. They aren't going to work for everyone, and it may in fact end up being exactly what you don't need. Some aspects may also be deemed unhealthy, and so this should be taken with a pinch of salt. It's just an alternative take on the topic; though, if you do the same and it works for you too, let me know please!*
TIP 1: Establish exactly how you learn
When I first started high school, I had a class called "Learning 2 Learn", which at the time I didn't take seriously - because how can you learn to learn? It was just confusing and the whole concept tripped me up too much to take anything in. But anyway, it turned out that the whole idea was to figure out what kind of learners we were, and from there, find the most efficient ways for us to study. Looking back on that class now, it was actually incredibly helpful; it taught me that everyone has different ways of taking in information. For example, my best friend was super smart in school, and passed every exam she sat with flying colours, but she managed to study simply by picking up a textbook and reading it the night before. I, on the other hand, had to (and still do) sit with example questions and write a model answer over and over again until it's been memorised like a script. Through this, I realised that I learn by "doing"; by carrying out tasks in order to memorise information. Not every method of studying works for all, and so by working out the most effective way for yourself, it will save a lot of time and lessens the risk of the information not going in. If you know you struggle to learn with a method that's been suggested to you by someone, don't try and force it to work!

(One of my much-recited model answers - that diagram still keeps me up at night)
TIP 2: Don't worry about the typical advice being given
Throughout my high school exams, my mum would occasionally hit out with this advice - "proper preparation prevents poor performance". From her point of view, she felt that I should have started studying ASAP to ensure I didn't end up having to cram before exams, and that doing so would reduce the risk of failure. She still comes out with it every so often, but I've since come to learn that while this may be true for a number of people, it doesn't actually apply to me (BTW - this is where you might feel that my tips don't apply to you - don't actually stop studying just because I've included this!). I've come to realise that I in fact retain more information and perform much better in exams when I really push myself to study, and the only way I can do this is by leaving myself a small amount of time. It sounds stupid (and running off of stress obviously isn't the healthiest of options), but when I know I don't have much time left, I force myself to sit and really focus on what I need to do - when I know I've got plenty of time, I'll procrastinate and get nothing done. Same goes for the claim that you can learn better early in the day compared to later at night; I find that I can give my full attention to the task at hand when everyone's asleep and there's nothing going on, whereas during the day there's too much going on to get anything done. Again, this doesn't work for everyone! But if you find that traditional advice doesn't work for you and your learning experience, don't be afraid to go against it and try something different!
TIP 3: To do lists are fab!
I make lists for EVERYTHING. I can't even prepare for travelling home without making a list of everything I need to clean or tidy away before I leave, and that's before the page-long checklist of clothes. Of course - as with the previous tips - not everyone will find writing lists useful, but I'm yet to find someone who hasn't at least understood the beneficial impact. Simply writing a list of things such as the tasks you need to do, the topics you need to cover or the layout of the course's syllabus will allow you to physically view everything requiring completion in black and white - doing this makes me feel a lot more in control of my workload as I can see exactly what is to be done, and it keeps me way calmer than I would be otherwise. Plus ticking items off one-by-one is a huge stress reliever!

TIP 4: Sleep, at least before the exam
Boring one, I know. Everyone reminds you to get plenty sleep when you're studying, and it is important of course. But I can't honestly say I take this advice, and so it's not something I can tell others to do. In the run up to exams, you are very likely to find me pulling an all-nighter in the university library, heading home at 7am for a couple hours' sleep and then getting up in the afternoon to head back up. My flatmates are constantly telling me off for it, but I just find it works for me. Here's the thing though, you will need sleep before the exam. I actually accidentally (seriously, it was accidental) stayed up all night before my last exam in January, convinced myself I'd learned enough to get an outstanding mark, and I left that exam hall feeling totally confident that I couldn't have got anything less than an A. I was dead certain that staying awake right through to the exam was the secret to success.
Thing is, not even five minutes later I couldn't recall what any of the questions had asked, let alone what I answered them with, and when the results came in I'd actually only got an upper C. Pull as many all-nighters as you want when you're studying, just make sure you ultimately get a healthy amount of rest in time for the big day!
We can do this lads.
Thursday, 23 March 2017
REVIEW | Primark P.S. Pro Oval Brushes
I've been putting off doing a review for ages! I feel like I'm better at just rambling and telling a story rather than being critical, but hopefully this will be the first of many :)

I'd started to notice more and more that people are opting for the oval brush trend over other applicators, and while at first I wasn't really that won over by them, I started getting more and more interested in what they'd actually be like to use. Here's the thing, though - as a student (living hours away from home too, boo), I don't exactly have the funds to spend on expensive, high quality items. This means that when trends like these come along, I either have to just accept my rubbish financial status, or I'll attempt to find a cheaper version!
I'm sure it's been evident in previous posts that I'm more than a little fond of rummaging through Primark, and so I headed in for a look the other day - I wasn't even aware they existed, but I came across a range of oval brushes under the P.S. range! Seeing as they were priced at £2.50, £3 and £4 depending on the size, I opted for the £4 large size; for that price, trying it wouldn't hurt!

So, I'm going to hold my hands up here - while I'm an owner of many brushes, I am very guilty of choosing to apply liquid foundation with my fingers instead. I know it's frowned upon, but I've just always gone with that option and I find it a lot quicker... So I decided to use the oval brush for this part of my make-up application, just so I could compare as a stubborn non-brush user over the years!
(Side-note, I applied by first off dotting my liquid foundation around areas of my face, then blending it in with the brush :))
The first thing I noticed was that the synthetic hairs were way softer than what I was expecting - I was worried that there would be visible brush strokes in the foundation where I'd blended. Additionally, the density meant that when blending, I found that I was actually able to use way less than I usually would just because it was spreading out a lot better than usual. I also felt that despite it being the largest size, I had no problems getting around my nose and eye area; admittedly, I don't really pay much attention there anyway, so it'd be interesting to see the difference with the smaller sizes.

I actually found that I applied my foundation quicker than my usual technique (or lack of!), and it gives a really nice finish - which I find rare given how bad my skin can get! My only questionable point is that the handle doesn't seem too strong; but then, for £4, you can't really complain! Overall, I'm really impressed with my purchase, and I think I've been convinced to actually start applying liquid foundation with a brush :)!
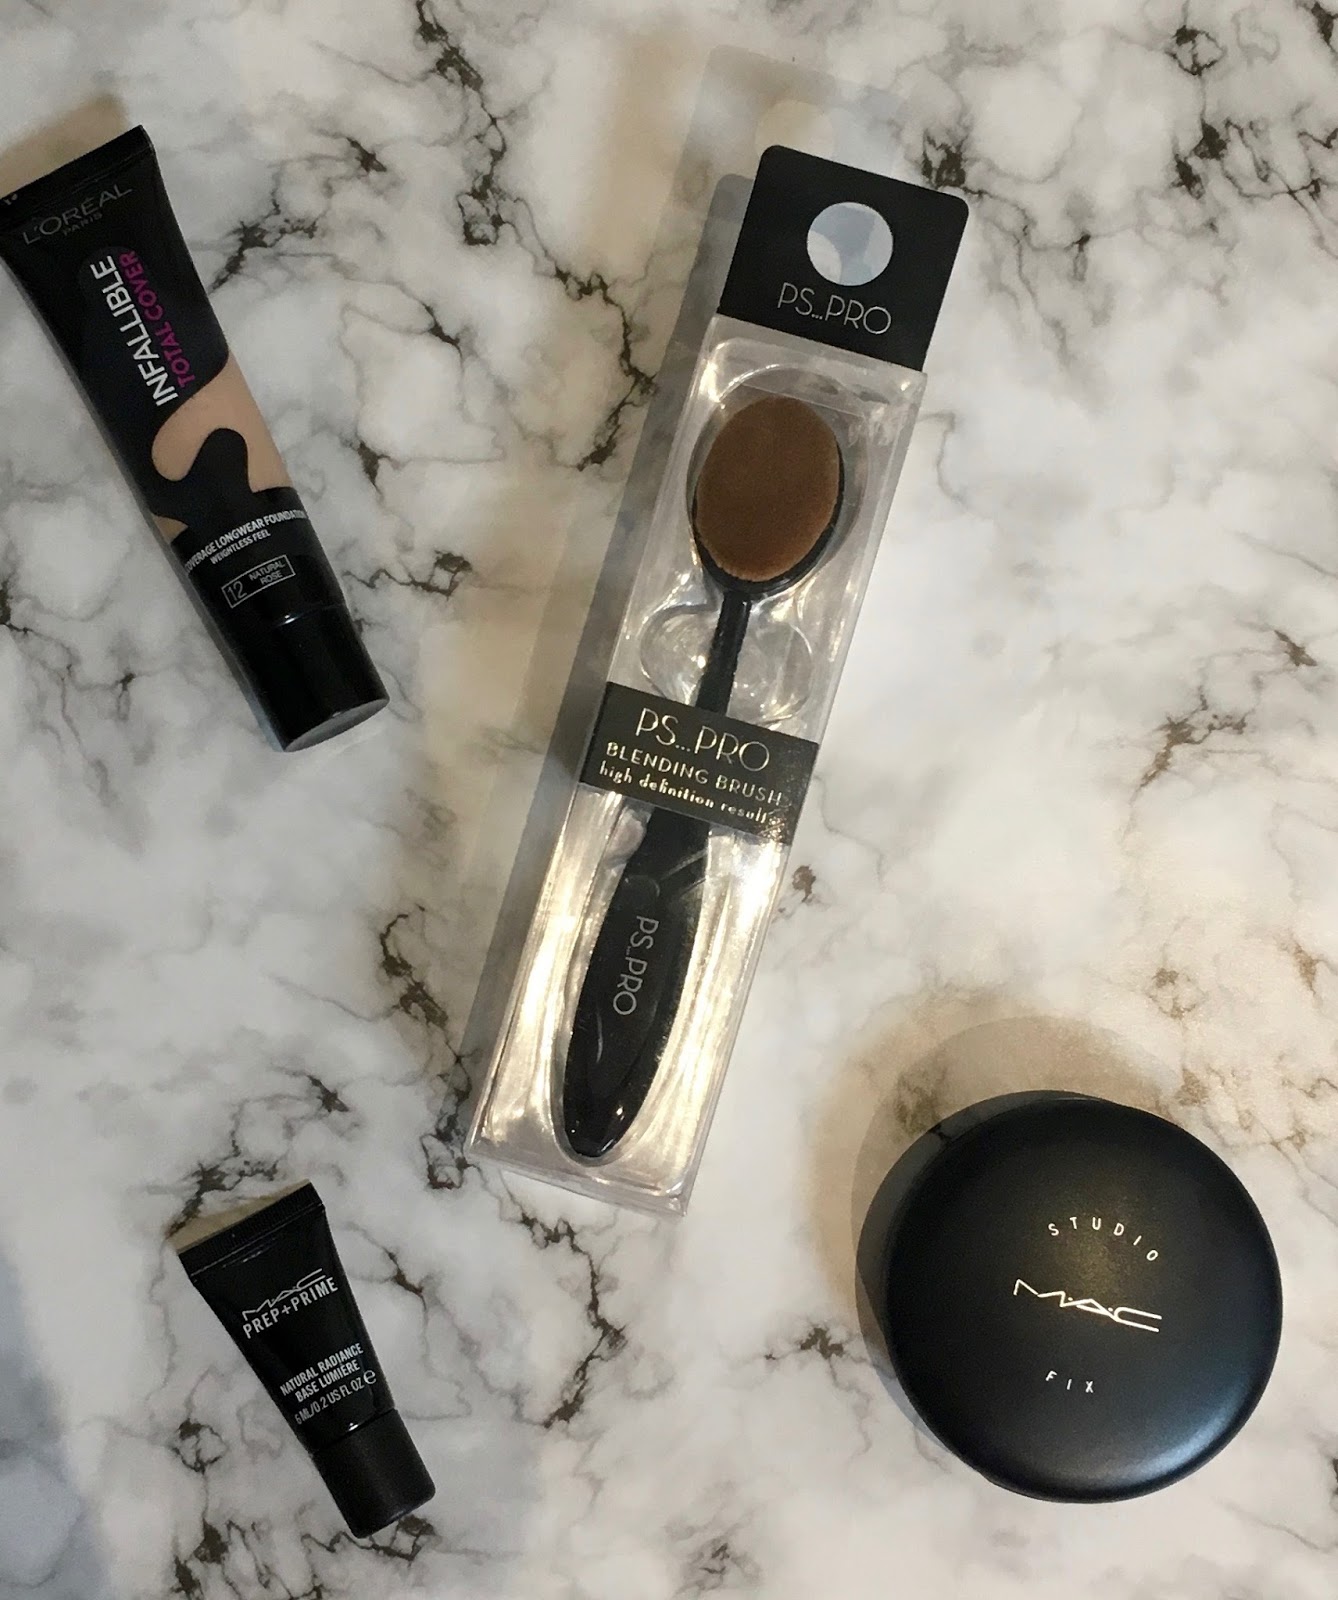
I'd started to notice more and more that people are opting for the oval brush trend over other applicators, and while at first I wasn't really that won over by them, I started getting more and more interested in what they'd actually be like to use. Here's the thing, though - as a student (living hours away from home too, boo), I don't exactly have the funds to spend on expensive, high quality items. This means that when trends like these come along, I either have to just accept my rubbish financial status, or I'll attempt to find a cheaper version!
I'm sure it's been evident in previous posts that I'm more than a little fond of rummaging through Primark, and so I headed in for a look the other day - I wasn't even aware they existed, but I came across a range of oval brushes under the P.S. range! Seeing as they were priced at £2.50, £3 and £4 depending on the size, I opted for the £4 large size; for that price, trying it wouldn't hurt!

So, I'm going to hold my hands up here - while I'm an owner of many brushes, I am very guilty of choosing to apply liquid foundation with my fingers instead. I know it's frowned upon, but I've just always gone with that option and I find it a lot quicker... So I decided to use the oval brush for this part of my make-up application, just so I could compare as a stubborn non-brush user over the years!
(Side-note, I applied by first off dotting my liquid foundation around areas of my face, then blending it in with the brush :))
The first thing I noticed was that the synthetic hairs were way softer than what I was expecting - I was worried that there would be visible brush strokes in the foundation where I'd blended. Additionally, the density meant that when blending, I found that I was actually able to use way less than I usually would just because it was spreading out a lot better than usual. I also felt that despite it being the largest size, I had no problems getting around my nose and eye area; admittedly, I don't really pay much attention there anyway, so it'd be interesting to see the difference with the smaller sizes.

I actually found that I applied my foundation quicker than my usual technique (or lack of!), and it gives a really nice finish - which I find rare given how bad my skin can get! My only questionable point is that the handle doesn't seem too strong; but then, for £4, you can't really complain! Overall, I'm really impressed with my purchase, and I think I've been convinced to actually start applying liquid foundation with a brush :)!
Tuesday, 14 March 2017
My Top 10 Guilty Pleasure Songs!
My Spotify playlists are on private for a very, very good reason.
I know a lot of people say they listen to obscure, old songs at times, and I love that. But I personally believe that if you can afford to listen to your choice of music through speakers instead of attempting to shield it away from public listening with the use of earphones, then it's just not bad enough.
This list is my top 10 guilty pleasure songs, and it was insanely hard to create - I could have made a top 50. I am proud of this struggle.
10. Crazy for You by Madonna (1985)
I'm not even sure why I listen to this song as often as I do! It's one I had to include, but I honestly have no idea what makes me like it so much. (Good start!)
9. Flying Without Wings by Westlife (1999)
This list could actually quite easily just consist of Westlife's greatest hits. But I decided to settle on my all-time favourite - I don't even know why I like it so much, I just know all the words and it annoys my boyfriend to no end.
8. Kiss From a Rose by Seal (1994)
Yup, Seal has made it onto this list. I told you, I always have to listen to my songs with earphones.
I actually can't even remember how I came across this song originally; I'm pretty sure it was a typo while searching on Spotify? However it came about, it hit me right in the feels. I recall being very stressed out with final exams and it calmed me down a whole load. It also made me feel like I was in some sort of late-90s, early-noughties film? This is a very hard one to explain, just listen.
UPDATE: Turns out it was actually used in a Batman film. So my film vibe was on point!
7. Wuthering Heights by Kate Bush (1978)
I'm pretty sure my listening to this song started off as a joke between me and a friend, we saw it as a pretty random song and we ended up making up a wee dance routine to it to do at random times. But then I just ended up liking the actual song anyway! HEAAATHCLIFF
6. One for Sorrow by Steps (1998)
I was definitely way more into Steps than S Club 7 as a child. So much so, that when I came across their collection on Spotify, I recalled all the lyrics to a good number of their songs. Then this one came along, and I realised that not only is it an absolute banger (for the 90s, at least), but it's actually one I overlooked an awful lot as a 4 year old for the likes of "Tragedy" and "Chain Reaction". I can only apologise, lads.
5. Something Good '08 by Utah Saints (2008)
I was all over this song when it first came out. The running man dance from the video was totally my thing, a skill I'm proud to say I still possess and will occasionally break out at parties. I actually only recently remembered that the songs exists, and I'm sad that it hardly ever gets played anywhere any more!
4. Cola Song by Inna (2014)
I actually didn't like this song when it was first released, it annoyed me a lot whenever it was on the radio! But then I went on holiday that year and it was playing everywhere, and they've continued to play it to death every year since... as I go to the same place every year, I ended up associating it with holidays and sunshine and it's now my go-to when I'm feeling blue :)
3. The Tide is High by Atomic Kitten (2002)
I was a huge Atomic Kitten fan as a child anyway, but I think my 6 year old dreams were made reality when this song made it into the opening credits of The Lizzie McGuire Movie. I was proud of them as if they were close friends, and I know there is a whole generation of us who will forever associate this song with falling into the bath with the shower curtain.
2. Never Forget by Take That (1995)
I have recently developed a deep love for pre-revival Take That, mostly through this song... I just find it really catchy! I feel like this is one that doesn't really require an explanation haha
1. ... Baby One More Time by Britney Spears (1998)
It kind of couldn't not be Britney, right? Given the amount of times in this song's 19 year existence (that can't be right surely) that I've listened to it, I think it's actually the only one I've never become sick of. If you pass me in my car, there is a 90% chance that I am singing along to it. Despite being 2 years old at the time of its release, I recall the music video being on my family's Windows 98 computer, and I still have pretty much each scene memorised. (Really gutted I couldn't put the actual video into this post!!)
And there we have it. No shame. Just love.
I know a lot of people say they listen to obscure, old songs at times, and I love that. But I personally believe that if you can afford to listen to your choice of music through speakers instead of attempting to shield it away from public listening with the use of earphones, then it's just not bad enough.
This list is my top 10 guilty pleasure songs, and it was insanely hard to create - I could have made a top 50. I am proud of this struggle.
10. Crazy for You by Madonna (1985)
I'm not even sure why I listen to this song as often as I do! It's one I had to include, but I honestly have no idea what makes me like it so much. (Good start!)
9. Flying Without Wings by Westlife (1999)
This list could actually quite easily just consist of Westlife's greatest hits. But I decided to settle on my all-time favourite - I don't even know why I like it so much, I just know all the words and it annoys my boyfriend to no end.
8. Kiss From a Rose by Seal (1994)
Yup, Seal has made it onto this list. I told you, I always have to listen to my songs with earphones.
I actually can't even remember how I came across this song originally; I'm pretty sure it was a typo while searching on Spotify? However it came about, it hit me right in the feels. I recall being very stressed out with final exams and it calmed me down a whole load. It also made me feel like I was in some sort of late-90s, early-noughties film? This is a very hard one to explain, just listen.
UPDATE: Turns out it was actually used in a Batman film. So my film vibe was on point!
7. Wuthering Heights by Kate Bush (1978)
I'm pretty sure my listening to this song started off as a joke between me and a friend, we saw it as a pretty random song and we ended up making up a wee dance routine to it to do at random times. But then I just ended up liking the actual song anyway! HEAAATHCLIFF
6. One for Sorrow by Steps (1998)
I was definitely way more into Steps than S Club 7 as a child. So much so, that when I came across their collection on Spotify, I recalled all the lyrics to a good number of their songs. Then this one came along, and I realised that not only is it an absolute banger (for the 90s, at least), but it's actually one I overlooked an awful lot as a 4 year old for the likes of "Tragedy" and "Chain Reaction". I can only apologise, lads.
5. Something Good '08 by Utah Saints (2008)
I was all over this song when it first came out. The running man dance from the video was totally my thing, a skill I'm proud to say I still possess and will occasionally break out at parties. I actually only recently remembered that the songs exists, and I'm sad that it hardly ever gets played anywhere any more!
4. Cola Song by Inna (2014)
I actually didn't like this song when it was first released, it annoyed me a lot whenever it was on the radio! But then I went on holiday that year and it was playing everywhere, and they've continued to play it to death every year since... as I go to the same place every year, I ended up associating it with holidays and sunshine and it's now my go-to when I'm feeling blue :)
3. The Tide is High by Atomic Kitten (2002)
I was a huge Atomic Kitten fan as a child anyway, but I think my 6 year old dreams were made reality when this song made it into the opening credits of The Lizzie McGuire Movie. I was proud of them as if they were close friends, and I know there is a whole generation of us who will forever associate this song with falling into the bath with the shower curtain.
2. Never Forget by Take That (1995)
I have recently developed a deep love for pre-revival Take That, mostly through this song... I just find it really catchy! I feel like this is one that doesn't really require an explanation haha
1. ... Baby One More Time by Britney Spears (1998)
It kind of couldn't not be Britney, right? Given the amount of times in this song's 19 year existence (that can't be right surely) that I've listened to it, I think it's actually the only one I've never become sick of. If you pass me in my car, there is a 90% chance that I am singing along to it. Despite being 2 years old at the time of its release, I recall the music video being on my family's Windows 98 computer, and I still have pretty much each scene memorised. (Really gutted I couldn't put the actual video into this post!!)
And there we have it. No shame. Just love.
Subscribe to:
Posts (Atom)