I feel like recently, I've been starting just about every blog post with an apology for a lack of posts...
I have no excuses this time; I've been working 9-5, and I figured I'd have time in the evenings and weekends to spend on writing... but it turns out I can nap a whole lot. I realised earlier that my last post was over a month ago (I thought it was like last week, I've been pretty bad), so I've kicked myself into gear.
I haven't done one of my beloved lists in a while, so here are my five favourite purchases of the summer (so far!):
1. Blue Eyelet Lace Up High Waist Skinny Jeans, New Look, £27.99
I love these jeans! I spotted them when I was in Glasgow a few weeks ago and wasn't sure about the whole lace-up look going on, but I couldn't stop thinking about them. I ended up back out in Glasgow the next week for work, so I went straight to New Look to pick up a pair and I have not been disappointed! I prefer the stretchy kind of fabric rather than hard denim jeans, and adore high waists - it feels weird wearing anything at my hips now, I wear them that often - so these are perfect :)
2. Jerome Russell Bblonde Maximum Highlighting Kit No.1, Boots, £6.99
I knoooooow. It was only a matter of months ago that I wrote a post totally blasting the idea of home bleaching, and I still wouldn't dare try to bleach the entirety of my hair again. But things were getting desperate; I'm at home on my little rock for the summer, the few hairdressers we have at home are all in high demand, and I'm never on the mainland long enough to get a patch test done right now. My original blonde from last year is now only coming up to the top of my ears, and despite trying to pass off my roots as being a dip dye look, I know fine that they're just roots. So, I went to Boots and sourced this:
I figured if it didn't work, then I'd just purchase a darker dye and go over it - totally responsible, I know! It works by pulling strands through the highlighter cap provided (which I loved, because I hate all these new "brush through" products!), applying the bleach, waiting between 15-90 minutes (this seemed like an incredibly vague time, so about 25 minutes worked for me), and then the usual wash out - and it was a success! I was so happy with the results. I'll probably do a full review later on to make up for my bashing of home dyes...
3. Essie Nail Polish in "Ballet Slippers"
I was forever doing my nails when I was younger, and for some reason I stopped when I was about 16, so I became determined to find a nice, natural shade that meant I had pretty-looking nails without being a ridiculous colour. Then one day I read an article about the Queen having this shade as her favourite, and I mean, what 20 year old doesn't look to the Queen as a style icon? I came across it in Boots and it looked pretty promising - and it definitely was! It's a lovely pale nude colour with a slight hint of pink (pink = instant winner), and my nails definitely look better for having it on. Plus it goes with anything I'm wearing!
4. H&M Off-the-Shoulder Blouse in White
A bit of a random one given that I've purchased waaay too many tops this summer, but this one is by far my favourite. I've been working in an office over the last few months, so I set out to find something I could wear that was acceptable there, but was also fashionable-looking enough. This definitely ticks both boxes! I loved it so much that I even took a 2010-style mirror selfie (featuring the lace-up jeans!), so there we go.
5. NYX Lid Lingerie Eye Tint
Another one I'll probably talk about more in depth later! I had no idea such a thing existed, but when I was visiting my friend in Lyon, she took me to a Monoprix and I was intrigued to see what they had in their NYX display - and came across these! I bought one to try out, and ended up going back the next day for more colours; it's incredibly lightweight when applying, and the colour comes through so well. Plus it stays on all day! I've never seen the range in the UK, but a Google search suggests that Boots might do them, so I'll definitely be on the lookout from now on!
Showing posts with label beauty. Show all posts
Wednesday, 26 July 2017
Wednesday, 21 June 2017
REVIEW | Benefit Brow Bar
Whenever I'm going on holiday, I always come up with a to-do list that I stick to religiously. Admittedly, this list is normally composed of clothes to purchase and beauty regimes to undertake... and these items tend to come before the more adult tasks like exchanging currency and purchasing insurance - but it works, okay? One of the tasks on the list, and probably the most important to me, after purchasing insurance, of course, is getting my eyebrows waxed and tinted.
It seems like a task that shouldn't really have that high an importance, but myself and my eyebrows have a love/hate relationship that dates back to an incident when I was around 14 years old and got a bit too carried away with a pair of tweezers. Six years later, and I just can't do them myself! I also like being able to sit by the pool without a full face of make-up, so the ability to tint them is also a god-send for me.
Knowing I was heading away, I booked myself in to the Benefit brow bar at House of Fraser in Glasgow (I've been to a few now, and it's definitely my favourite location!). Normally I'd have phoned up or called in, but I noticed that there was a new online booking service available - I say "new", I'm not sure how long it's been there for to be honest! Probably just an oversight on my behalf! It was so, so much easier than having to search for the number and extension code; plus, not only does it offer a list of available times, but it also allows you to choose who you want to do your waxing! I wasn't fussed about that, so I opted for it to choose at random.
Due to my student financial status, I hadn't been able to call in for a couple of months, so my brows were in desperate need of being attended to (I actually didn't realise how bad they'd got until I took the photos!); this was the state they were in beforehand, without make-up:
I never leave the house without drawing in my eyebrows, though, so this is what they normally look like; I didn't get this photo in the same light as before, so they've ended up looking a little bit neater! Still needing maintenance though:
When I arrived at the bar, there was a number of people waiting to be served. I love having a look around anyway though so having to wait five minutes didn't bother me! Eventually I got called over, and the fabulous Emma set to work!
One thing I love about this particular Benefit location is the fact that the girls who work there genuinely seem like they enjoy talking to customers. They're all so, so friendly - I've never felt like they're having to make conversation just because it's their job. I also love that they offer advice on make-up techniques, but never push for you to purchase beyond what you're there for. I keep making jokes about my finances as a student, but I genuinely don't have the funds to be able to afford new products on a whim, so the fact that they're not fussed about extra sales really puts me at ease.
It's become apparent in past waxing sessions that I'm a ridiculously flinchy person... Like, the wax will only just be getting applied and I'm already squirming, it's that bad. I've had times before where whoever's been doing them has actually had to stop and give me tips on how to relax; but this time, I can honestly say that I didn't even really notice any pain just because Emma had managed to reassure me. It turned out that she'd waxed a few of my friends who were going on holiday with me in the last few days, so we ended up chatting about that for most of the time!
Knowing I was going to be in the sun in the days following, she also made sure I had advice on aftercare to ensure I didn't cause any damage to the area. I love a place that cares just as much about after you leave as they do about you while you're in their responsibility!
So, this was the finished result - bear in mind, she had only applied concealer around the areas where there was a bit of redness (also really bad for that!); the only product on my brows here is the tint she'd applied beforehand:
*To anyone who noticed - I KNOW. I'm just as annoyed that I took a photo of the one brow for this, it upset my love of patterns too*
I absolutely adore my eyebrows after getting them waxed and tinted with Benefit, and this trip was no exception. I managed about three weeks before I had to start giving them attention again, which is pretty decent for me given that I'm forever finding strays! Being able to go that little while without having to worry about dealing with them is so fab. I admit that I've seen a couple of mixed reviews from people, but I 100% think it's worth the £21.50!
Thursday, 6 April 2017
REVIEW | Liz Earle Natural Skincare
Skincare has been a big thing for me since the age of about 11. It seems really young to me now, but despite not really wearing make-up properly until I was 13 or so, I was unfortunate enough to have had problem skin from around then; at one point, I was having to attend dermatologist appointments every six weeks and take medication, which was seriously not fun as a teenager :(
Luckily, I've been blessed with a mother who is a proud owner of just about every skincare product under the sun, and after years of experimenting (and quite a bit of time watching tutorials on QVC), she's helped me to find the best range for my skin. I'm very grateful for the fact that everything eventually cleared up around 16/17, and so far I've managed to avoid any repeat cases, but that hasn't been without work.
One range that I've used on and off for years is Liz Earle; in particular, the Cleanse & Polish cleanser, Instant Boost skin tonic, and the Skin Repair moisturiser (their Orange Blossom Botanical body wash is also amazing for sensitive skin, but that's going off topic for now!).
I have to admit, it was the first range of products I used when my problems started, and it actually wasn't right for me at the time - it just didn't agree with my skin, but now that I look back, I'm not sure if that was actually the case or if it was just that it required more attention than a skincare routine. After years of switching between different brands, I came back to Liz Earle around a month ago, and I've fallen in love (and I've also totally realised why my mum was so gutted that I couldn't use it years ago). I know it's hardly a new release and there'll be so many reviews online by now, but I figured I'd go through the products I've been using!
This is the first step in the process - probably my favourite too (it smells reaaally nice and it's so good to see your make-up practically melt away!). It's also won a number of awards, and rightly so. It suits all skin types, and there are so many natural ingredients in there.
The first part is the "cleanse" stage, where you simply apply the cream straight to your face (no need to include anything else, just straight on whether you've got make-up on or not), and massage it in to remove any trace of make-up. The best part about this, for me at least, is the fact that it's totally safe to use on eye make-up, so no need to faff about with any other products! I tend to wear a heavy amount of make-up daily, yet I only ever need to use two pumps' worth at the most. A little goes a long way!
Once you've spread it all over - and in my case, caused your face to go a dark grey colour with the mix of mascara/eyeliner/foundation - you then move onto the next stage; you guessed it, "polish". This is where you take the muslin cloth (there's normally two provided when you purchase the set), run in under warm/hot water, and then use it to remove the cleanser. Even when I wasn't using Liz Earle's products, I still always used the muslin cloth to remove whatever I was using! They're super useful and are designed to exfoliate and remove dead skin, so your face ends up feeling sooo soft and hydrated.
For myself personally, I find that the product always makes my skin look a lot brighter after use. It's also great when I do have the occasional breakout; it somehow manages to tone down any redness, and just generally makes my skin feel a whole lot more smoother. It kind of makes me wish I'd just persevered with it way back when it was at its worst!
Luckily, I've been blessed with a mother who is a proud owner of just about every skincare product under the sun, and after years of experimenting (and quite a bit of time watching tutorials on QVC), she's helped me to find the best range for my skin. I'm very grateful for the fact that everything eventually cleared up around 16/17, and so far I've managed to avoid any repeat cases, but that hasn't been without work.
One range that I've used on and off for years is Liz Earle; in particular, the Cleanse & Polish cleanser, Instant Boost skin tonic, and the Skin Repair moisturiser (their Orange Blossom Botanical body wash is also amazing for sensitive skin, but that's going off topic for now!).
I have to admit, it was the first range of products I used when my problems started, and it actually wasn't right for me at the time - it just didn't agree with my skin, but now that I look back, I'm not sure if that was actually the case or if it was just that it required more attention than a skincare routine. After years of switching between different brands, I came back to Liz Earle around a month ago, and I've fallen in love (and I've also totally realised why my mum was so gutted that I couldn't use it years ago). I know it's hardly a new release and there'll be so many reviews online by now, but I figured I'd go through the products I've been using!
Cleanse & Polish Hot Cloth Cleanser
This is the first step in the process - probably my favourite too (it smells reaaally nice and it's so good to see your make-up practically melt away!). It's also won a number of awards, and rightly so. It suits all skin types, and there are so many natural ingredients in there.
Once you've spread it all over - and in my case, caused your face to go a dark grey colour with the mix of mascara/eyeliner/foundation - you then move onto the next stage; you guessed it, "polish". This is where you take the muslin cloth (there's normally two provided when you purchase the set), run in under warm/hot water, and then use it to remove the cleanser. Even when I wasn't using Liz Earle's products, I still always used the muslin cloth to remove whatever I was using! They're super useful and are designed to exfoliate and remove dead skin, so your face ends up feeling sooo soft and hydrated.
For myself personally, I find that the product always makes my skin look a lot brighter after use. It's also great when I do have the occasional breakout; it somehow manages to tone down any redness, and just generally makes my skin feel a whole lot more smoother. It kind of makes me wish I'd just persevered with it way back when it was at its worst!
Instant Boost Skin Tonic
Next is the Instant Boost tonic, which is fab toner with a gorgeous scent (to be fair, all the products have a nice smell, there's no need to point it out). It's great for ensuring that any remnants of make-up are removed before the final stage, and I find it leaves my skin feeling totally refreshed. It can be applied by simply pouring a dab onto a cotton wool pad and using it to just glide over your face. ** MUM TIP. I wouldn't have known this without mum telling me, but apparently it isn't suitable for using on your eyes. Maybe this is common knowledge for toners and I'm just out of the loop, but anyway ** I always make sure not to skip this one, just because I like being reassured that I've got as much of the day's make-up off as possible. Plus it just generally leaves my skin feeling really good!
Skin Repair Moisturiser - Normal/Combination
The final step is the moisturiser, which again, I totally love. To be honest, I was using a really great moisturiser before this and so I thought it would be hard to try and beat, but this one is just as good - if not better, considering it's a fraction of the price. Once again, a little goes a long way with this product, and the results are always really visible to me the next morning. I always find that I wake up looking fresh (somewhat, let's not get too carried away), and I especially notice how well this moisturiser works for me when applying foundation; I use the MAC Studio Fix powder, and previously I tended to find that I'd end up all patchy due to areas of dry skin. Not any more! I'm really pleased with this, and I'd even consider continuing to use it as my daily moisturiser even if I changed up the rest of the routine.
Apologies if this has gone on forever, I'm still new to the whole reviewing thing! This was definitely something I was determined to do one on though, so hopefully it'll serve to help out in some way :) Thanks to everyone who's given me feedback so far, it's been a huge help! ♡
Follow my blog with Bloglovin
Thursday, 23 March 2017
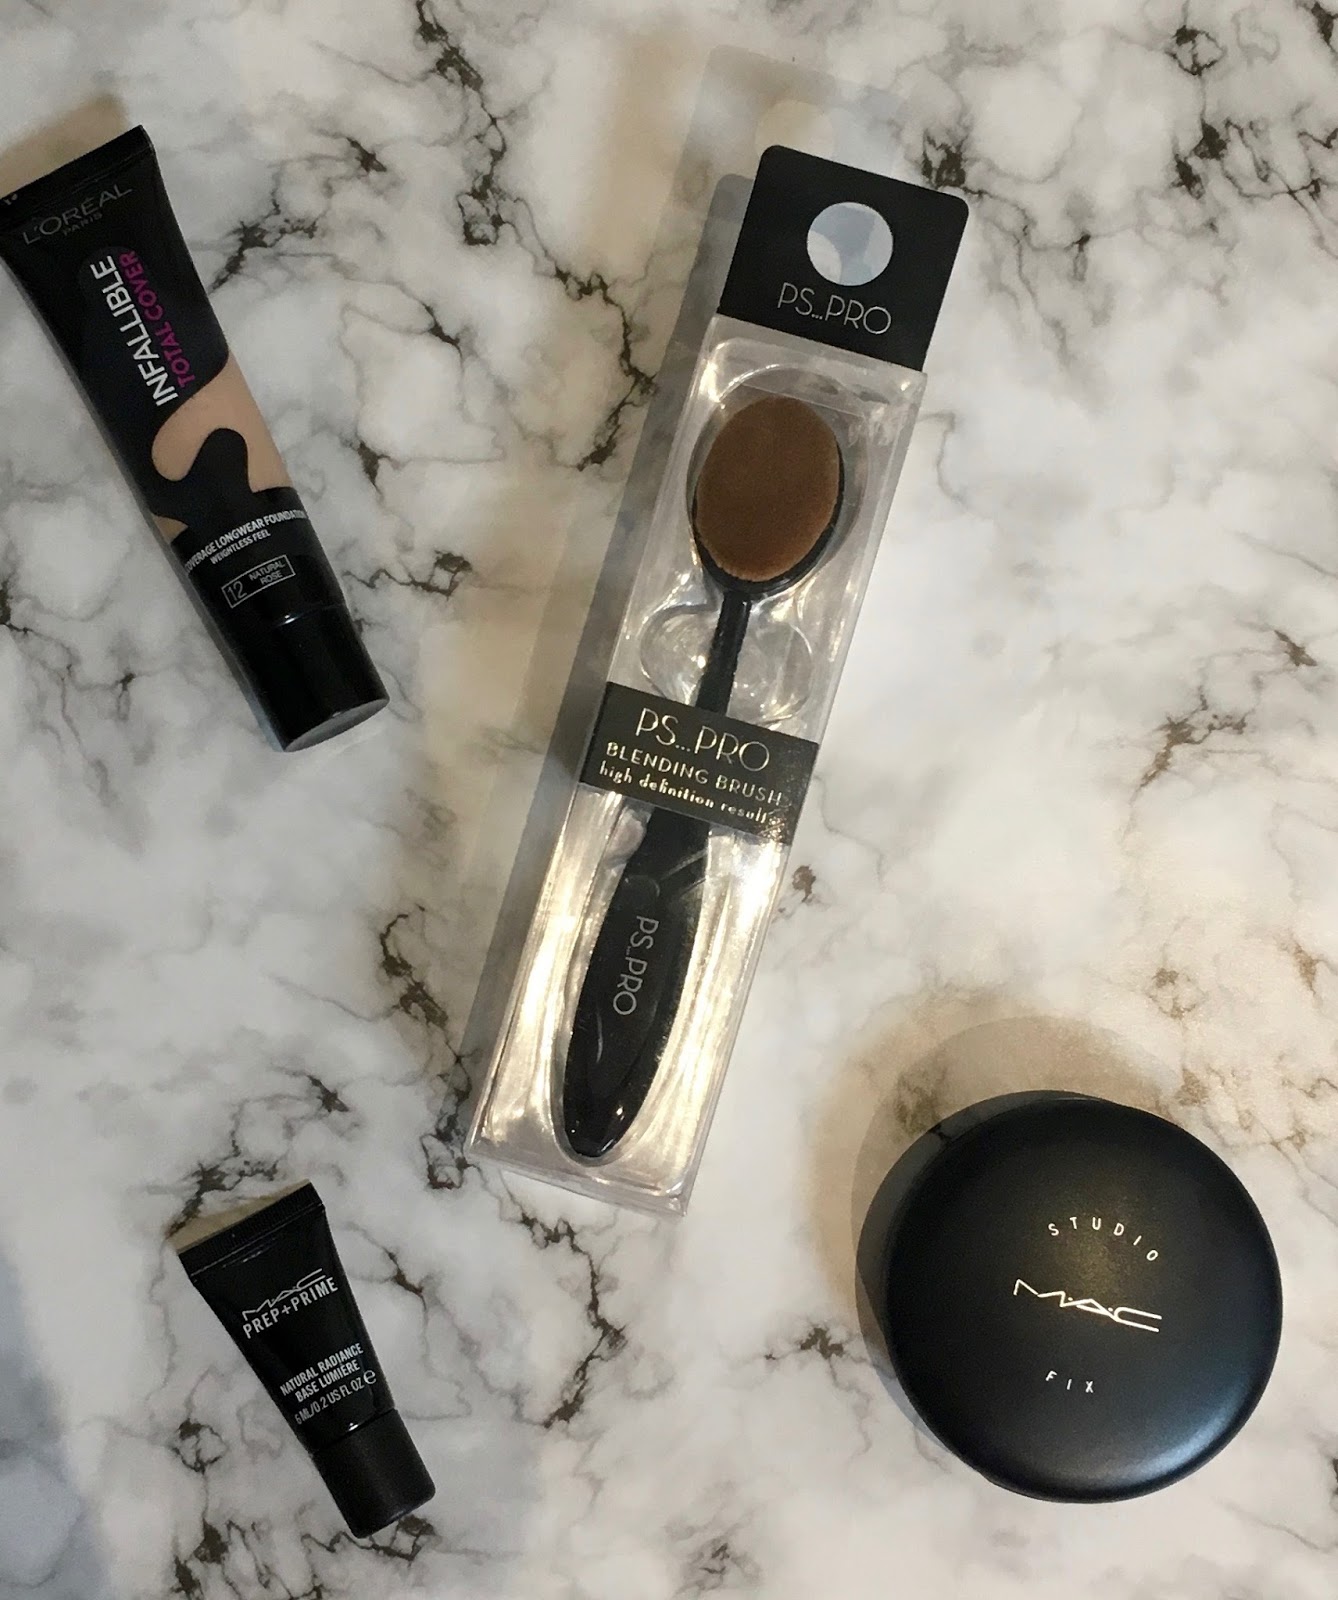
REVIEW | Primark P.S. Pro Oval Brushes
I've been putting off doing a review for ages! I feel like I'm better at just rambling and telling a story rather than being critical, but hopefully this will be the first of many :)
I'd started to notice more and more that people are opting for the oval brush trend over other applicators, and while at first I wasn't really that won over by them, I started getting more and more interested in what they'd actually be like to use. Here's the thing, though - as a student (living hours away from home too, boo), I don't exactly have the funds to spend on expensive, high quality items. This means that when trends like these come along, I either have to just accept my rubbish financial status, or I'll attempt to find a cheaper version!
I'm sure it's been evident in previous posts that I'm more than a little fond of rummaging through Primark, and so I headed in for a look the other day - I wasn't even aware they existed, but I came across a range of oval brushes under the P.S. range! Seeing as they were priced at £2.50, £3 and £4 depending on the size, I opted for the £4 large size; for that price, trying it wouldn't hurt!
So, I'm going to hold my hands up here - while I'm an owner of many brushes, I am very guilty of choosing to apply liquid foundation with my fingers instead. I know it's frowned upon, but I've just always gone with that option and I find it a lot quicker... So I decided to use the oval brush for this part of my make-up application, just so I could compare as a stubborn non-brush user over the years!
(Side-note, I applied by first off dotting my liquid foundation around areas of my face, then blending it in with the brush :))
The first thing I noticed was that the synthetic hairs were way softer than what I was expecting - I was worried that there would be visible brush strokes in the foundation where I'd blended. Additionally, the density meant that when blending, I found that I was actually able to use way less than I usually would just because it was spreading out a lot better than usual. I also felt that despite it being the largest size, I had no problems getting around my nose and eye area; admittedly, I don't really pay much attention there anyway, so it'd be interesting to see the difference with the smaller sizes.
I actually found that I applied my foundation quicker than my usual technique (or lack of!), and it gives a really nice finish - which I find rare given how bad my skin can get! My only questionable point is that the handle doesn't seem too strong; but then, for £4, you can't really complain! Overall, I'm really impressed with my purchase, and I think I've been convinced to actually start applying liquid foundation with a brush :)!
I'd started to notice more and more that people are opting for the oval brush trend over other applicators, and while at first I wasn't really that won over by them, I started getting more and more interested in what they'd actually be like to use. Here's the thing, though - as a student (living hours away from home too, boo), I don't exactly have the funds to spend on expensive, high quality items. This means that when trends like these come along, I either have to just accept my rubbish financial status, or I'll attempt to find a cheaper version!
I'm sure it's been evident in previous posts that I'm more than a little fond of rummaging through Primark, and so I headed in for a look the other day - I wasn't even aware they existed, but I came across a range of oval brushes under the P.S. range! Seeing as they were priced at £2.50, £3 and £4 depending on the size, I opted for the £4 large size; for that price, trying it wouldn't hurt!
So, I'm going to hold my hands up here - while I'm an owner of many brushes, I am very guilty of choosing to apply liquid foundation with my fingers instead. I know it's frowned upon, but I've just always gone with that option and I find it a lot quicker... So I decided to use the oval brush for this part of my make-up application, just so I could compare as a stubborn non-brush user over the years!
(Side-note, I applied by first off dotting my liquid foundation around areas of my face, then blending it in with the brush :))
The first thing I noticed was that the synthetic hairs were way softer than what I was expecting - I was worried that there would be visible brush strokes in the foundation where I'd blended. Additionally, the density meant that when blending, I found that I was actually able to use way less than I usually would just because it was spreading out a lot better than usual. I also felt that despite it being the largest size, I had no problems getting around my nose and eye area; admittedly, I don't really pay much attention there anyway, so it'd be interesting to see the difference with the smaller sizes.
I actually found that I applied my foundation quicker than my usual technique (or lack of!), and it gives a really nice finish - which I find rare given how bad my skin can get! My only questionable point is that the handle doesn't seem too strong; but then, for £4, you can't really complain! Overall, I'm really impressed with my purchase, and I think I've been convinced to actually start applying liquid foundation with a brush :)!
Subscribe to:
Posts (Atom)